 Jandel Leaks 1")
Look, if you’re reading this, chances are you’ve popped open your PC case and immediately regretted it. Yeah, I’ve been there too. That layer of dust coating your motherboard? It’s not just gross – it’s literally choking the life out of your system.
Here’s the deal: cleaning your motherboard might sound scary, but it’s way easier than you think. Plus, doing it right can actually bring your sluggish PC back from the dead. We’re talking better temps, fewer crashes, and overall smoother performance.
In this guide, I’ll walk you through exactly how to clean your motherboard without bricking it (because that would suck). You’ll learn when to use compressed air, when to break out the isopropyl alcohol, and most importantly, what NOT to do. Let’s get your PC breathing easy again.
Your motherboard is basically the nervous system of your PC. Every single component—your CPU, RAM, graphics card, storage – all connect through this bad boy. It’s the central circuit hub that allows components like the CPU, graphics card, and memory to receive power and communicate with each other.
But here’s the problem: because it’s positioned horizontally in most cases, dust settles on it like snow on a rooftop. Add in the fact that your case fans are constantly pulling in air (and whatever particles are floating in your room), and you’ve got yourself a dust magnet.
What makes it worse? That dust isn’t just sitting there looking ugly. It can cause overheating by blocking airflow around VRMs and chipsets, create short circuits if moisture gets involved, and eventually lead to system instability. Not fun when you’re mid-game or working on something important.
Honestly? More often than you probably are right now.
If you’re regularly maintaining your PC, a quick dust-off every three to six months is solid. Just pop the side panel, hit it with some compressed air, and you’re good. Takes like 10 minutes tops.
But if your PC has been sitting there for a year or more without any attention? Or if you notice your temps creeping up, random crashes, or visible dust bunnies inside the case? That’s when you need to do a proper deep clean.
The best part is you don’t need to be some tech wizard to do this. You just need the right tools, a bit of patience, and the willingness to follow some simple steps.
Before we dive in, let’s get your toolkit sorted. Here’s what you actually need:
Must-Have Items:
Nice-to-Have Extras:
The isopropyl alcohol is your secret weapon for stubborn grime. You want at least 90% pure isopropyl alcohol, though 99% is ideal because these liquids break down stains, are non-conductive, and dry fast enough to prevent damage.
Let’s talk about the stuff that’ll actually mess up your motherboard, because avoiding disasters is half the battle.
Alright, let’s start with the easy stuff. If your motherboard just needs a routine dust-off, this is all you need to do.
Shut down your PC completely. Not sleep mode, not hibernate—fully powered off. Unplug the power cable from the back and any other cables connected to your system. Hit the power button a couple times after unplugging to discharge any residual power.
Move your PC to a well-lit area, preferably somewhere you don’t mind getting a bit dusty. Outside or a garage works great.
Remove the side panel using your screwdriver. Most modern cases use thumbscrews or quick-release mechanisms, so this should be easy. Set the panel aside somewhere safe.
Hold your compressed air can upright (this is important—tilting it can spray liquid propellant) and use short bursts to blow dust off the motherboard. Start from one corner and work your way across systematically.
Pay extra attention to:
Pro tip: Don’t spray directly at fans or you might spin them too fast and damage the bearings. Hold the fan blades still or remove them if possible.
For dust that doesn’t want to budge, use your soft-bristle brush to gently loosen it. Then hit it again with compressed air. The combo of brushing and blowing works way better than either method alone.
Once you’ve got all the loose dust out, wipe down the inside of the case with a microfiber cloth. Close everything back up, plug in your cables, and boot up. You’re done!
Sometimes your motherboard needs more than just a dust-off. Maybe you spilled something, maybe it’s from a smoker’s house, or maybe it’s just been neglected for way too long. That’s when it’s time for a deep clean with isopropyl alcohol.
Fair warning: this takes more time and requires more care. But if your board is really grimy, it’s worth it.
Before you even think about using alcohol, you need to fully disassemble your PC. I’m talking everything:
Even though you’re doing a deep clean, start with compressed air to remove loose dust and debris. No point wasting alcohol on stuff that’ll blow away easily.
Use your brush to get into slots, headers, and around components. Be gentle—you’re not scrubbing a pan here.
Now for the good stuff. There are two approaches depending on how dirty your board is:
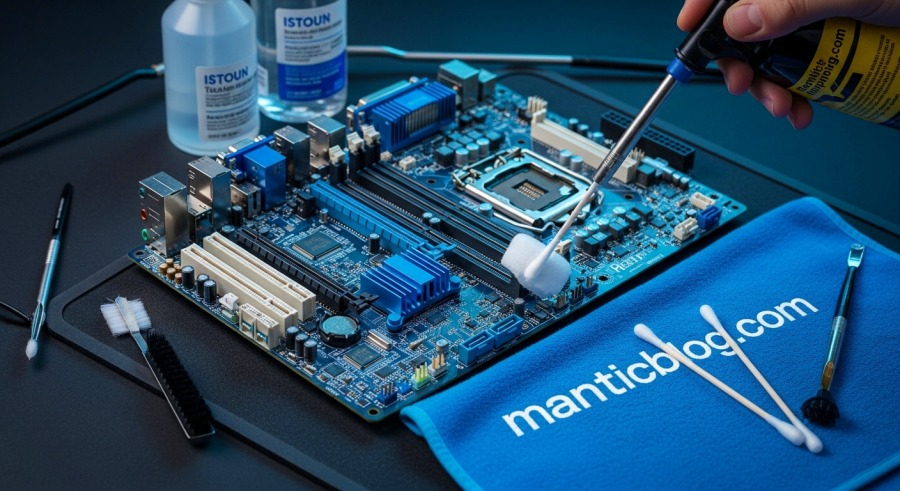
Spot Cleaning (for most situations): Dip a cotton swab in 99% isopropyl alcohol and squeeze out any excess. You want it damp, not dripping.
Work on one area at a time, gently wiping away grime from the PCB surface, around components, and in slots. Use fresh swabs as they get dirty.
This method is perfect for removing sticky residues, stubborn dust buildup, or thermal paste spills.
Alcohol Bath (for extreme cases): If you’re dealing with a severely contaminated or non-functional motherboard, you can submerge it in a small container filled with 99% or 100% isopropyl alcohol. Remove the CMOS battery first.
Let it soak for a few minutes, gently agitate it, then remove and let it air dry completely. This dissolves even the most stubborn gunk.
Honestly though? The bath method is pretty extreme. Most people will never need it. Spot cleaning handles 95% of situations.
This is where patience saves the day. Let your motherboard air dry completely before reassembling anything. We’re talking at least an hour minimum, preferably several hours or overnight.
You can speed things up with gentle bursts of compressed air, but never use heat sources like hair dryers.
The alcohol will evaporate pretty fast, but you want to be absolutely certain there’s no moisture trapped under components before applying power.
Since you’ve already torn everything apart, might as well give the other stuff some love too.
CPU Cooler: Blow out the heatsink fins with compressed air and wipe the base plate clean of old thermal paste.
Graphics Card: Similar deal—compressed air for the heatsink and fans. Don’t forget to clean the gold contacts on the PCIe connector with a bit of alcohol on a cloth.
RAM Sticks: Wipe them down with a microfiber cloth. The contacts usually don’t need cleaning unless you’ve had stability issues.
Case and Fans: Clean all case fans thoroughly. They accumulate tons of dust. Remove them if you can to do a proper job.
Power Supply: Don’t disassemble it (seriously, capacitors can hold dangerous charges), but you can blow dust out through the vents from the outside.
The Moment of Truth
Hit that power button. If you did everything correctly (and you probably did), your PC should boot right up.
If you removed the CMOS battery, you might need to enter BIOS and load default settings or reconfigure things like boot order and XMP profiles.
Check your temps under load to make sure everything’s cooling properly. Your efforts should show up as lower temperatures, especially on the CPU and VRMs.
Look, cleaning is great and all, but prevention is way easier.
Keep your PC off the floor. Carpet is basically a dust factory. Put your case on your desk or at least on a raised platform.
Use positive air pressure in your case. This means more intake fans than exhaust, which helps keep dust from sneaking in through every crack.
Install dust filters on all intake fans and actually clean them regularly. Once a month takes like 30 seconds.
Don’t eat or drink near your PC. Spills happen, and they’re way worse than dust.
If you live in a dusty environment or have pets, consider more frequent cleaning sessions. Every three months instead of six.
PC Won’t Boot After Cleaning
Don’t panic. Check that all power cables are firmly connected, especially the 24-pin and 8-pin CPU power cables. Reseat your RAM and graphics card. Make sure you didn’t bump any small components loose.
Weird Smells or Sounds
If you smell burning or hear unusual noises, power down immediately. You might have missed some moisture or damaged something during cleaning. Let everything dry longer and inspect carefully.
Temperature Issues Persist
If your temps are still high after cleaning, your thermal paste application might be the culprit. Or your cooler might not be mounted correctly. Could also be a sign your cooler itself is just inadequate for your CPU.
For those of you who really want to go all-in, here are some pro-level techniques.
Ultrasonic Cleaning
If you’re serious about motherboard maintenance or repair, an ultrasonic cleaner is incredible. Get one with at least a 3-liter tank and a degass function, which removes air bubbles for better cleaning results. Use a PCB-specific cleaning solution, not random cleaners.
After ultrasonic cleaning, rinse with alcohol to displace any trapped water, then dry completely.
Contact Cleaner Spray
For gold contacts and connectors, contact cleaner spray works better than alcohol. It’s designed specifically for electronics and leaves no residue.
Flux Remover
If you’ve done any soldering work or are dealing with really sticky residues, flux remover is the professional choice. It’s basically what manufacturers use during production.
Let’s be real: cleaning a motherboard carries some risk. Static electricity can damage components, liquid can cause shorts, and physical damage is always possible if you’re too rough.
If your motherboard is still under warranty, check with the manufacturer before doing any liquid cleaning. Some warranties get voided if you use unauthorized cleaning methods.
For really valuable or complex systems, professional cleaning services exist. They have ultrasonic cleaners, proper ESD protection, and insurance if something goes wrong. Might be worth the cost for a $3000 gaming rig.
And if you’re dealing with liquid spills (especially sugary drinks or other conductive liquids), you might want to let a professional handle it. Those situations need immediate action and expertise.
Can I clean my motherboard without removing it from the case?
Yeah, for basic dust removal with compressed air, you don’t need to take it out. Just open the side panel and go to town. But for deep cleaning with alcohol, you really should remove it for better access and to avoid damaging other components.
How often should I clean my motherboard?
Basic dusting every 3-6 months is good for most people. Full deep cleaning once a year or only when necessary. If you smoke, have pets, or live somewhere really dusty, maybe every 3 months for basic cleaning.
Is 70% isopropyl alcohol okay to use?
It can work in a pinch, but 99% is way better. The higher percentage evaporates faster and contains less water, reducing the risk of moisture damage. The extra money for 99% is worth it.
What if I don’t have compressed air?
An electric air duster is a great reusable alternative. Some people use soft brushes alone, but it takes longer. Avoid using your mouth to blow—moisture from your breath is bad news.
Can I use a hair dryer to dry my motherboard faster?
Not recommended. Hair dryers blow hot air that can damage components or thermal pads. They also aren’t great at precision drying. Stick with room temperature air circulation or compressed air.
Will cleaning my motherboard improve gaming performance?
Directly? Not really. But if your system was thermal throttling due to dust buildup, you’ll see better performance after cleaning. Lower temps mean higher boost clocks and more consistent frame rates.
Is it safe to clean a laptop motherboard the same way?
The principles are the same, but laptops are way more cramped and delicate. Disassembly is also more complex. If you’re comfortable with laptop teardowns, go for it. Otherwise, maybe stick to external cleaning and let professionals handle the inside.
What about cleaning the CMOS battery slot?
Yeah, clean it gently with a cotton swab and alcohol. Just make sure it’s completely dry before putting the battery back. And heads up—removing the CMOS battery resets your BIOS settings.
Can dust actually kill my motherboard?
Yep, over time. Dust causes heat buildup which degrades components faster. It can also absorb moisture and become conductive, potentially causing short circuits. Heat and electrical issues are major factors in motherboard failure.
Should I wear gloves while cleaning?
Anti-static gloves are ideal. Medical gloves work too. Regular fabric gloves aren’t great because they can generate static. Going bare-handed is fine if you ground yourself with a wrist strap or by touching the case frequently.
Cleaning your motherboard isn’t as scary as it seems, and honestly, it’s something every PC owner should know how to do. Whether you’re just blowing dust out with compressed air or going full deep-clean with isopropyl alcohol, the key is taking your time and being gentle.
Your motherboard is tough, but it’s not indestructible. Treat it with respect, follow the steps we covered, and you’ll have a clean, happy system that runs cooler and more stable.
The satisfaction of seeing all that dust and grime gone? Totally worth the hour or two it takes. Plus, knowing you can maintain your own hardware is a pretty good feeling.
If you found this guide helpful, make sure to bookmark it for next time. And hey, maybe set a reminder on your phone to actually clean your PC in a few months. Your motherboard will thank you.
Now go forth and clean responsibly. Your PC deserves it.
 99x Luck Boosts 2")
 Location Guide 3")
 Update Party 4")
 Best Characters & Team Comps 5")


 10")